A minimalist Tunisian crochet placemat pattern and coasters that can be completed by a beginner with some basic cross stitch!
Keywords: Tunisian crochet placemat, Tunisian crochet mat pattern, Tunisian crochet table mat, Tunisian crochet coaster pattern, Tunisian crochet dish mat, Tunisian simple stitch placemat, Tunisian crochet colorwork placemat, Tunisian crochet border for placemat, Tunisian crochet textured mat, Tunisian crochet stitch variations for placemats, Crochet placemat pattern, Crochet table mat, Crochet dining mat, Crochet coaster pattern, Crochet dish mat, Crochet place setting, Crochet table setting, Crochet rectangular placemat, Crochet textured placemat, Crochet colorwork placemat, Crochet border for placemat, Crochet stitch pattern for placemat, Crochet easy placemat pattern, Crochet beginner placemat, Crochet farmhouse placemat pattern, Crochet coaster pattern, Crochet drink coaster, Crochet mug rug, Crochet coaster set, Easy crochet coaster, Beginner crochet coaster, Crochet coaster tutorial, Quick crochet coaster, Crochet coaster square, Crochet coaster with texture, Crochet coaster with border, Crochet colorwork coaster
This post contains affiliate links. If you purchase anything using those links I will get a small commission at no extra cost to you
Tunisian Crochet Placemat Pattern Inspiration:
Back in May I was invited to participate in a fun challenge by Hobbii Yarn and I had to hop on! The challenge was based on the four elements – Earth, Sky, Fire, and Water – and we were invited to explore and interpret these elements through our pattern designing skills.
I chose Earth and decided to create a minimalist kitchen set using Hobbii Friends cotton 8/8 to represent the Earth element.
I made some coasters and a matching placemat. Before I settled on this design, I played around with stitch combinations and different ways to add colorwork. The first option was Tunisian simple stitch with basic colorwork (1st pic), second option was Tunisian simple stitch and then added colorwork using cross stitch (2nd pic), and the third option was Tunisian simple stitch for the colorwork part and Honeycomb for the plain part (3rd pic). After some input and contemplation, I decided on the cross stitch version! I liked that it adds colorwork without actually doing any colorwork or carrying floats and I love that it’s a subtle minimalist touch. I absolutely love how it turned out!
Furls is having a Labor Day Sale! All out-of-season products, such as Zodiac seasons and Limited Editions, or items being discontinued, will be offered at 40-50% off their regular retail price.
This pattern was designed in collaboration with Crochet Foundry Magazine for the 2023 Blog Hop, find all the free patterns featured HERE.
The Autumn Diamonds Cape is a beautiful first project as we await those crisp Autumn days. Try your hand at this Entrelac hooded Cape to practice some basic Tunisian crochet stitches and techniques! It’s easy enough for a beginner but interesting enough for an advanced crocheter!
Keywords: Crochet cape pattern free, crochet cape, crochet cape patterns free, crochet cape with hood pattern, free crochet cape patterns for adults, easy crochet cape pattern free, crochet medieval hooded cloak pattern, how to crochet a cape for beginners, how to crochet a hooded scarf for beginners, free crochet patterns, crochet shawl, crochet poncho patterns free, crochet cape free pattern, crochet cape with hood, crochet hooded cape pattern, hooded shawl crochet pattern free, crochet poncho pattern ravelry, oversized hooded poncho crochet pattern, crochet ponchos and shawls, crochet poncho for ladies, crochet cape with hood free pattern, tunisian entrelac crochet, entrelac tunisian crochet, entrelac crochet pattern, entrelac crochet written pattern, entrelac crochet patterns free, entrelac crochet pdf, tunisian entrelac crochet patterns free, entrelac crochet in rows, entrelac tunisian crochet instructions, entrelac crochet patterns for beginners, tunisian entrelac crochet written pattern
Design Inspiration:
Like many of my fellow cocheters, I am waiting for Fall to arrive because I am done with this heat! Also Fall is my absolute favorite season for so many reasons. One reason is that my birthday comes in Fall! I love the crisp cool breeze in the Fall, the weather is just perfect for crocheting. I designed this pattern with that cool Autumn breeze in mind. Something to drape around you as you crunch those Fall leaves and have your Apple Cider/Pumpkin Lattes. Ps. I cannot do Pumpkin flavored anything although I don’t mind pumpkins floating around as decor! You could also wear the Autumn Diamonds Cape as you sit by a campfire/bonfire roasting some marshmallows.
This free crochet cape pattern is a collaboration for an ongoing Blog Hop hosted by Crochet Foundry Magazine. You can find a lot of amazing free patterns featured over on the blog hop here. I chose to design this gorgeous cape using the Wander Yarn because I have loved working with it in the past. I also designed a Color block Wrap last year for Furls Crochet using this yarn and I absolutely loved how it turned out. You can find the Colors of the Wind Wrap pattern here.
I knew I wanted to design something that doesn’t require a Tunisian crochet hook so I went with the Entrelac technique which I recently became hooked on (no pun intended). You can find a complete 3-part series that takes you through the technique over on my YouTube Channel which I highly recommend you watch before getting started. Check out the Tunisian Crochet Entrelac Playlist here. I have included a FULL photo tutorial as part of this pattern which you’ll find throughout the written instructions.
I added an oversized hood to give a dramatic effect although the hood is optional. You will need a Tunisian crochet hook for the hood. I also wanted to incorporate the honeycomb stitch in some way because it’s my favorite Tunisian crochet stitch. I used it to add a band to the hood and I love the contrast against the Tunisian simple stitch.
This design was a bit of a challenge because the Entrelac stitch is different than just straight Tunisian crochet since you are working in blocks and it gives a chevron/jagged effect to the finished project. I wanted to keep one edge straight to counter that effect so I added an entrelac edging and finished it off with a single crochet border all around to add a finished look.
I hope you love the design and love making your own Autumn Diamonds Cape! Please don’t forget to tag me on Instagram @noorsknits and Facebook @noorsknits1 if you make it!
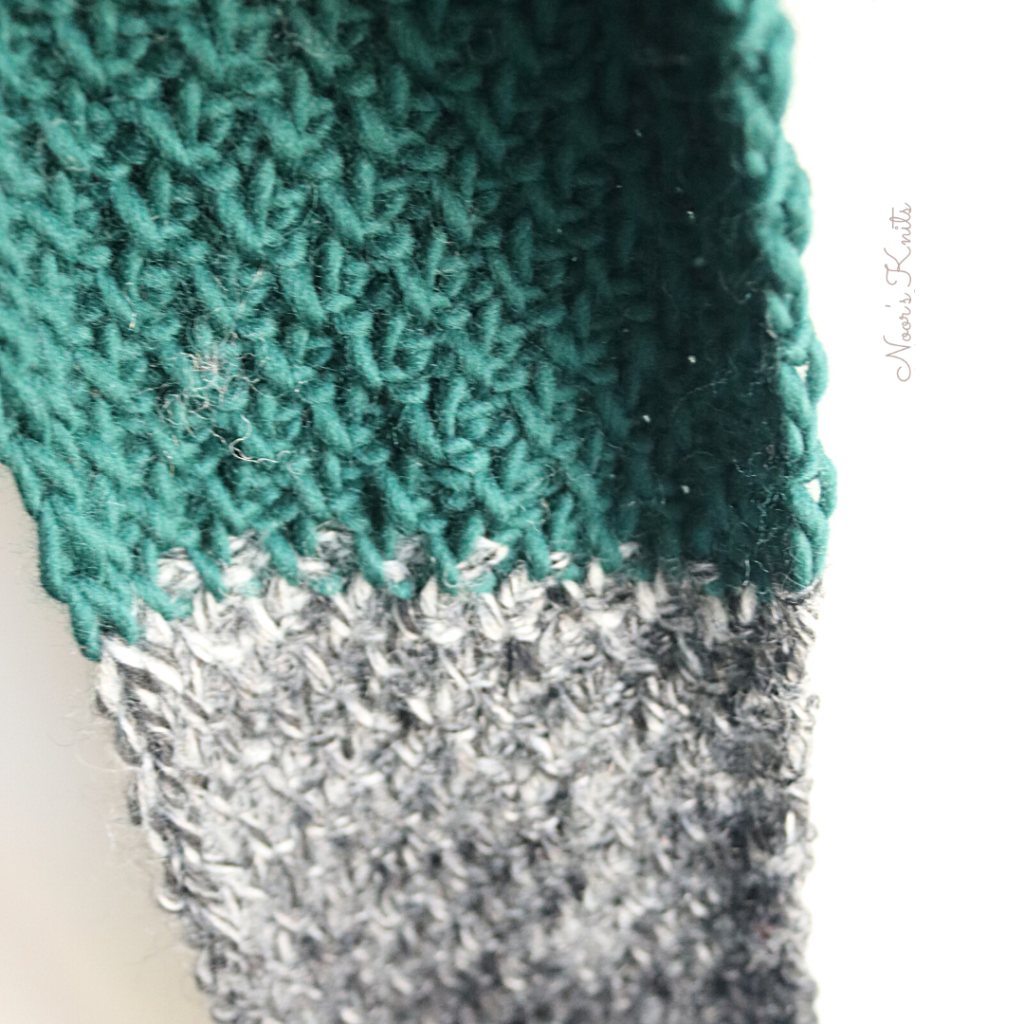
This pattern is for an advanced beginner textured Tunisian crochet entrelac hooded cape! It’s the perfect accessory for your Fall wardrobe. Practice some basic Tunisian crochet stitches while creating a cozy cape! The best part is you don’t need a Tunisian crochet hook for the cape! You will need one to make the hood which is optional! This pattern was tech edited by Erin Battle of Yarn Matter.
A few months ago I also designed the Spring Blooms Vest for the Crochet Foundry Magazine April issue which you can find here.
About the Pattern:
Skill Level
Advanced-Beginner
Yarn:
Col A – Furls Crochet Wander Yarn in Thatch 7 skeins approximately 840 yards Size 4 worsted weight; 3.5 oz/100 g, 120 yds/109 m; 100% acrylic
Col B – Furls Crochet Wander Yarn in Mahogany 8 skeins approximately 960 yards Size 4 worsted weight; 3.5 oz/100 g, 120 yds/109 m; 100% acrylic
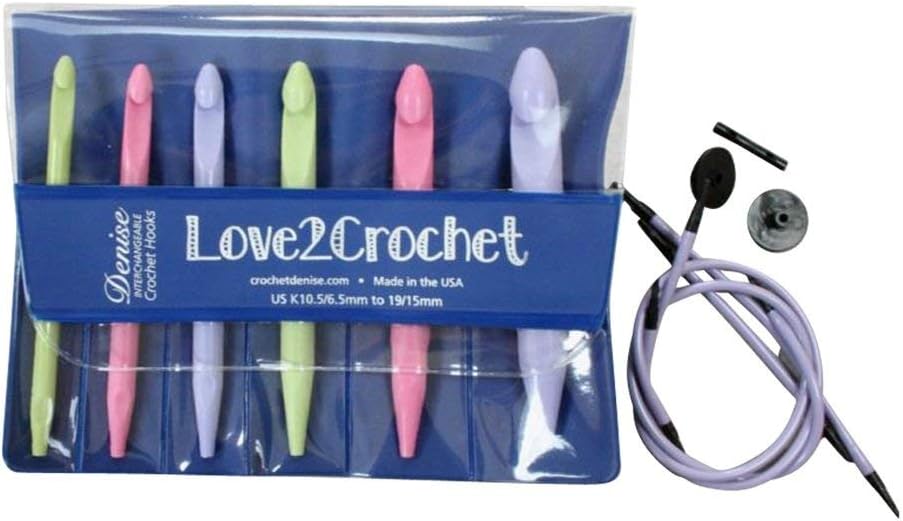
Size 8.0 mm Tunisian crochet hook (at least 12 in. long or with a cable and stopper that is 12 in. long). Check out my favorite Clover Interchangeables set here or my other favorite the Denise Interchangeable set here
Gauge is 16 sts over 12 rows in Tunisian simple stitch for a 4 x 4 in. square using 8.0 mm crochet hook
Finished Size:
The cape is 48 x 42 in. including the hood
Abbreviations (US terms):
Ch(s): Chain(s) Tss: Tunisian simple stitch Tps: Tunisian purl stitch RetP: Return Pass -Explained below Norm RetP: Normal Return Pass Edge RetP: Edging Return Pass Sl st: Slip stitch Sc: Single crochet St(s): Stitches Beg: Beginning Col: Color Rep: Repeat
This pattern uses a few Tunisian crochet techniques. Use the following video tutorials as needed
HELPFUL VIDEO TUTORIALS
TUNISIAN CROCHET FOUNDATION ROW AND TUNISIAN SIMPLE STITCH
TUNISIAN CROCHET ENTRELAC COMPLETE PLAYLIST
TUNISIAN CROCHET ENTRELAC ROW 1
TUNISIAN CROCHET ENTRELAC ROW 2
TUNISIAN CROCHET ENTRELAC ROW 3
TUNISIAN CROCHET ENTRELAC BORDER
HOW TO BIND OFF IN TUNISIAN CROCHET
HOW TO SINGLE CROCHET JOIN
HOW TO SINGLE CROCHET
HOW TO TUNISIAN CROCHET HONEYCOMB STITCH
Pattern rows are Forward pass instructions. Do not turn the work.
A regular crochet hook is used because only a small number of sts are held on the hook for each block.
The following instructions are implied:
The loop already on the hook at the beginning of the row counts as the first st.
Return Pass: Follow the foundation row and each row with the Return Pass.
Return Pass: *Yarn over, pull through two loops; repeat from * until 1 loop remains on the hook. *This is different from the normal return pass, you will not be chaining 1 at the beginning of the return pass unless it is an edge block*
Normal Return Pass: Ch 1, *yarn over, pull through two loops; repeat from * until 1 loop remains on the hook.
Edging Return Pass: *Yarn over and draw through 2 loops on hook; rep from * until three loops remain on hook. Pull through all 3 loops.
Each Entrelac Row consists of Blocks of Tunisian Crochet. Each Block is made by working rows of Tunisian Crochet over a small section of sts from the previous row.
Row 7 of each Block is not worked in Tunisian Crochet, but is worked in a single pass of sl sts only. The yarn is fastened off at the end of each Entrelac Row and the next color is joined to the beginning of the row for the next Entrelac Row.
The odd-numbered Entrelac Rows are made of blocks of Col A Thatch and the even-numbered rows are made of blocks of Col B Mahogany.
CROCHET FOUNDRY MAGAZINE AUGUST ISSUE 15% OFF FOR A LIMITED TIME!
In this issue, Crochet Foundry is featuring 7 brand new crochet patterns + a bonus pattern, interviews with CEO Deltra Perryman of Crochet Fashion Week and Crochet Designer Shawn Layne of BNHO Crochet.
For a limited time, save on the Crochet Foundry August single issue and the Summer pattern bundle!
Crochet Foundry August issue has eight brand new, exclusive designs!
Get 15% off the single issue, or the Seasonal Bundle, using code:
Row 1: Forward Pass: Insert hook in 2nd ch from hook and draw up a loop, (insert hook in next ch and draw up a loop) 6 times; leave remaining chs unworked – 8 loops on hook. Complete RetP.
Rows 2-6: Forward Pass: Keeping all loops on hook, (insert hook from right to left into next vertical bar, yarn over and draw up a loop) 6 times, insert hook in next unworked ch of foundation ch and draw up a loop – 8 loops on hook. Complete RetP.
Row 7 (Last Row of Block): (Loosely sl st in next vertical bar) 6 times, sl st in next unworked ch of foundation ch.
Blocks 2-9
Row 1: Forward Pass: (Insert hook in next unworked ch of foundation ch and draw up a loop) 7 times; leave remaining chs unworked – 8 loops on hook. Complete RetP.
Rows 2-7: Rep Rows 2-7 of Block 1.
Block 10
Rows 1-6: Rep Rows 1-6 of Block 2.
Row 7 (Last Row of Block): (Loosely sl st in next vertical bar) 6 times, sl st in same foundation ch as last loop of Row 6, sl st in last foundation ch.
Fasten off Col A.
ENTRELAC ROW 2:
NOTES
1. The first Block of this row is worked across a small foundation chain and is joined to the side edge of the first Block of the previous Entrelac Row.
2. Blocks 2-9 are worked across the top edge of the same Block (to which the previous Block was joined to the side edge) and joined to the side edge of the next Block.
3. The last Block is worked across the top edge of the last Block in the previous Entrelac Row, but is not joined to any other Blocks.
With RS facing, join Col B with sl st in edge of Row 1 of Block 1 of previous Entrelac Row. Note: When joining to the edge of Row 1, insert hook under 2 strands.
Block 1
Row 1: Forward Pass: Ch 7 (to make foundation ch), insert hook in 2nd ch from hook and draw up a loop, (insert hook in next ch and draw up a loop) 5 times, insert hook in same st where Col B was joined and draw up a loop – 8 loops on hook. Complete RetP.
Rows 2-6: Forward Pass: Keeping all loops on hook, (insert hook from right to left into next vertical bar, yarn over and draw up a loop) 6 times, insert hook in end of next row of same Block in previous Entrelac Row and draw up a loop – 8 loops on hook. Complete RetP.
Row 7(Last Row of Block): (Loosely sl st in each vertical bar) 6 times, sl st in first sl st of last row (Row 6) of same Block in previous Entrelac Row.
Note: Place a marker in the first sl st of Row 6, to indicate where you will join yarn for Entrelac Row 3.
Blocks 2-10
Row 1: Forward Pass: (Insert hook in next vertical bar on the block below from the previous Entrelac Row and draw up a loop) 6 times, insert hook in end of Row 1 of next Block of previous Entrelac Row and draw up a loop – 8 loops on hook. Complete RetP.
Rows 2-7: Rep Rows 2-7 of Block 1.
Block 11
Row 1: Forward Pass: (Insert hook in next vertical bar on the block below from the previous Entrelac Row and draw up a loop) 6 times and pull up a loop into the chain connecting the entrelac blocks in the previous row – 8 loops on hook. Complete Norm RetP.
Rows 2-6: Keeping all loops on hook, (insert hook from right to left into next vertical bar, yarn over and draw up a loop) 6 times, insert hook under 2 strands of ch at end of row and draw up a loop – 8 loops on hook. Complete Norm RetP.
Row 7(Last Row of Block): (Loosely sl st in each vertical bar) 6 times, insert hook under 2 strands of ch at end of row and work a sl st.
Fasten off Col B.
ENTRELAC ROW 3
With RS facing, join Col A with sl st in marked st in Row 6 of Block 1 of Entrelac Row 2.
Block 1
Row 1: Forward Pass: (Insert hook in next vertical bar and draw up a loop) 6 times, insert hook in end of Row 1 of next Block in previous Entrelac Row and draw up a loop – 8 loops on hook. Complete RetP.
Rows 2-7: Rep Rows 2-7 of Block 1 of Entrelac Row 2.
Blocks 2-9
Rep Blocks 2-10 of Entrelac Row 2.
Block 10
Rows 1-6: Rep Rows 1-6 of Block 2.
Row 7 (Last Row of Block): (Loosely sl st in next vertical bar) 6 times, sl st in same st as last loop of Row 6, sl st in first sl st of last row (Row 7) of same Block in previous Entrelac Row.
Fasten off Col A.
Rep Entrelac Rows 2 and 3, alternating colors each Entrelac Row until the piece measures about 48 in. from beg. End on a Row 3 repeat. Fasten off.
With Col A, add an entrelac border (see instructions below) to Long Edge A, this will be the edge that goes along your neck and in the front. We will attach the hood to the middle top of this side. Then with Col B, Sc around loosely for the entire project and join to the first stitch with sl st.
Entrelac Border:
Refer to this video for how to complete the edging:
With the right side facing you, join Col A to the top corner of the first block along Long Edge A with a sl st.
Note: This border is worked along the edge stitches of the block in the previous entrelac row.
Row 1: Forward Pass: (Insert hook in next end stitch and draw up a loop) 6 times, insert hook in beginning of Row 1 of next Block in previous Entrelac Row and draw up a loop – 8 loops on hook. Complete Edge RetP.
Row 2: Forward Pass: Skip first st, (insert hook in next vertical bar and draw up a loop) 5 times, insert hook in last vertical bar of Row 1 of next Block in previous Entrelac Row and draw up a loop – 7 loops on hook. Complete Edge RetP.
Row 3: Forward Pass: Skip first st, (insert hook in next vertical bar and draw up a loop) 4 times, insert hook in next vertical bar of Row 1 of next Block in previous Entrelac Row and draw up a loop – 6 loops on hook. Complete Edge RetP.
Row 4: Forward Pass: Skip first st, (insert hook in next vertical bar and draw up a loop) 3 times, insert hook in next vertical bar of Row 1 of next Block in previous Entrelac Row and draw up a loop – 5 loops on hook. Complete Edge RetP.
Row 5: Forward Pass: Skip first st, (insert hook in next vertical bar and draw up a loop) 2 times, insert hook in next vertical bar of Row 1 of next Block in previous Entrelac Row and draw up a loop – 4 loops on hook. Complete Edge RetP.
Row 6: Forward Pass: Skip first st, (insert hook in next vertical bar and draw up a loop) 1 time, insert hook in next vertical bar of Row 1 of next Block in previous Entrelac Row and draw up a loop – 3 loops on hook. Return Pass: Yarn over and draw through all 3 loops.
Row 7: Forward Pass: (insert hook in the middle st of the 3 stitches that you pulled through in the previous row and draw up a loop) 1 time, insert hook in last vertical bar of Row 1 of next Block in previous Entrelac Row and draw up a loop – 3 loops on hook. Return Pass: Yarn over and draw through all 3 loops. Sl st into the end st. Refer to this part of the video:
Repeat Rows 1-7 until you have worked the last corner. Fasten off.
This is what the entrelac border should look like:
Join Col B at one of the edges and Sc around loosely. Fasten off. This is what the Sc border should look like:
Crochet Cape Pattern FREE Hood Construction:
Measure 8 in. for the larger hood and 11 in. for the smaller hood from either edge of the entrelac border and place 2 st markers as seen. This will be where your hood will be attached.
Ch 50 with Col B using an 8.0 mm Tunisian crochet hook that’s at least 12 in. long or with a cord and stopper.
Row 1 (Foundation Row): Pick up a loop in the back bump of the second chain from the hook, continue picking up loops in each chain across. Complete Norm RetP. (50 sts)
Row 2: Tss across. Complete Norm RetP. (50 sts)
Repeat Row 2 until the piece measures 32 in. for a larger hood and 26 in. for a smaller hood.
Double over with the right side facing out and place st markers along the doubled over long edge (along the sides of the rows) and whip st along the markers. Refer to schematics above.
The second doubled over long edge will be used to join the hood to the cape.
Line up the bottom of the hood with the center of the cape with the back side facing you.
There should be approximately 8 in. on either side (for the larger hood size) and 11 inches on either side (for the smaller hood size). Attach with st markers placed along the cape and Sc join the hood to the cape.
With the right side of the hood and cape facing, join Col B at the right corner of hood and Sc around the frame of hood. Fasten off.
Hood Honeycomb band:
This band will be worked up in the honeycomb stitch consisting of Tunisian simple stitch and Tunisian purl stitch.
Ch 5.
Row 1 (Foundation Row): Pick up a loop in the back bump of the second chain from the hook, continue picking up loops in each chain across. Complete Norm RetP. (5 sts)
Repeat Rows 2 and 3 until the piece measures 25 in.
Bind off, turn and ch 1, Sc across the bind off edge. With the right side of the cape and hood facing you, align the band with the hood frame, sl st into the right corner of the hood and Sc join the band to the frame of the hood.
Cords:
With Col B, hold double stranded and ch 40, ch 1 and turn and Sc into each chain across, sl st cord onto corner of hood. Fasten off. Repeat for the second side.
Weave in all loose ends and steam block.
You are done! Have any questions? The best way to reach me is via email: [email protected]. Share your finished cape with me on social media using the hashtag #AutumnDiamondsCape for a chance to be featured! Tag me on Instagram @noorsknits and on Facebook @noorsknits1
Keywords: crochet like knit, crochet stitches designs, how to do tunisian stitch, tunisian crochet patterns, tunisian crochet stitches, tunisian crochet stitches tutorial, tunisian crochet stitches videos, learn to crochet, learn tunisian crochet, tunisian simple stitch tutorial, crochet towel topper tutorial, crochet kitchen pattern, crochet towel topper pattern, crochet towel toppers, kitchen towel toppers crochet, American flag crochet pattern, free crochet kitchen patterns, towel topper crochet pattern free, towel topper patterns free, modern crochet kitchen towel topper, double towel topper crochet pattern, how to crochet a towel topper for beginners
This pattern is for a crochet kitchen towel topper in the American colors. It’s a beginner project to practice the basics of Tunisian crochet!
Happy Fourth! Enjoy a new FREE crochet kitchen towel topper pattern!
In honor of the Fourth, I thought I’d make something fun, in this crochet kitchen towel topper pattern you will learn how to do basic Tunisian crochet stitches, colorwork, and how to increase and decrease stitches! Oh and you’ll get a super cute functional product in the end! A crochet towel topper or crochet towel holder perfect for your kitchen! I also released a Canadian version on the 1st for all my Canadian makers! You can check out the Canehdian Towel Topper here.
Today can be a day filled with gratitude but also a day wondering how to be part of a community you only partially identify with. Here’s a short poem I wrote in honor of Fourth of July:
“Somewhere in the in-between, my face hidden, yet seen. Clashing cultures, bold beliefs, virtuous values. Speaking loudly, exactly what I mean. I keep questioning. I keep going, despite where I’ve been. I long for humanity, in this ultimate race. United in equality, peace, and justice, we shall win.”
Gauge is 9 sts over 7 rows in Tunisian simple stitch for a 2 x 2 in. square using a 5.5 mm hook.
Finished Size:
7 x 2 in. folded over with wooden rings
Crochet towel topper Pattern Notes:
This pattern is for a fun crochet kitchen towel topper featuring the American colors. It’s the perfect beginner colorwork project to practice the basic Tunisian crochet stitches!
This pattern uses a few Tunisian crochet techniques. Use the following video tutorials as needed:
Ch: Chain Tss: Tunisian simple stitch RetP: Return Pass -Explained above Sc: Single crochet Inc: Increase Tks: Tunisian knit stitch Tss2tog: Tunisian simple stitch two together
Crochet Kitchen Towel Topper Pattern Instructions
COLOR CHART
Note: Complete color chart in Tunisian simple stitch. Refer to the chart above. Refer to the video tutorial for how to complete colorwork.
Join Col A to a wooden ring with a slip knot. Sc 6 around a wooden ring.
Row 1: Turn and work the foundation row into the sc stitches. Pick up a loop into the next 6 sts. Complete normal RetP.
Row 2: Inc, Tss across until there are 2 sts remaining, inc, work last st as normal. (9 sts)
Row 3: Repeat row 2. Now you should have 11 sts.
Rows 4 and 5: Tss across, work last st as normal. (11 sts). At the end of RetP on Row 5, join Col B Rows 6 and 7: Tss across. (11 sts). On row 7, at the end of the RetP join Col C.
Rows 8 and 9: Tss across. (11 sts). On row 9, at the end of the RetP join Col B.
Rows 10 to 13: Repeat rows 4 to 7.
Row 14 to 22: Tss across (11 sts). On row 22, at the end of the RetP join Col C.
Pattern continued
Rows 23 and 24: Tss across (11 sts). On row 24, at the end of RetP join Col B
Rows 25 and 26: Tss across (11 sts). On row 26, at the end of the RetP join Col C.
Rows 27 and 28: Tss across (11 sts). On row 28, at the end of the RetP join Col B
Rows 29 and 30: Tss across (11 sts). On Row 30, at the end of the RetP join Col A. Leave a 6 in. tail each of Col B and Col C and cut yarn.
Rows 31 and 32: Tss across (11 sts).
Row 33: Tss2tog, tss across until there are 3 sts remaining, tss2tog, work last st as normal. (9 sts)
Row 34: Repeat row 33 (7 sts)
Row 35: Tss across (7 sts).
Take a wooden ring and go through each vertical bar, sc around the ring. Leave a 6 in. tail and cut yarn.
Take a 12 in. double-stranded piece of Col C yarn and cross stitch on the Col A sections to make stars. Leave a 6 in. tail and cut yarn. Weave in all loose ends.
You are done! Have any questions? The best way to reach me is via email: [email protected]
Share your finished topper with me on social media using the hashtag #StarSpangledTowelTopper for a chance to be featured! Tag me on Instagram @noorsknits and Facebook @noorsknits1
Keywords: crochet like knit, crochet stitches designs, how to do tunisian stitch, tunisian crochet patterns, tunisian crochet stitches, tunisian crochet stitches tutorial, tunisian crochet stitches videos, learn to crochet, learn tunisian crochet, tunisian simple stitch tutorial, crochet towel topper tutorial, crochet kitchen pattern, crochet towel topper pattern, crochet towel toppers, kitchen towel toppers crochet, Canadian flag crochet pattern, free crochet kitchen patterns, towel topper crochet pattern free, towel topper patterns free, modern crochet kitchen towel topper, double towel topper crochet pattern, how to crochet a towel topper for beginners
A Tunisian crochet towel topper pattern with a simple Canadian maple leaf colorwork section to practice basic Tunisian crochet stitches!
Happy Canada Day! I am kicking off my pattern sale with a brand new pattern to celebrate Canada Day!
Since I won’t be able to have my poutine and Timmies, I thought I’d make something for us Canadian crocheters to make myself feel better! In this project, you will learn how to do basic Tunisian crochet stitches, colorwork, and how to increase and decrease stitches! Oh and you’ll get a super cute functional product in the end! A crochet towel topper or crochet towel holder perfect for your kitchen!
Gauge is 18 sts over 14 rows in Tunisian simple stitch for a 4 x 4 in. square using a 6 mm hook.
Finished Size:
Short size is 15 x 4.5 inches
Long size is 19 x 4.5 inches
Pattern Notes:
This pattern is for a fun Tunisian crochet towel topper featuring the Canadian maple leaf.. It’s the perfect colorwork project to practice the basic Tunisian crochet stitches!
This pattern uses a few Tunisian crochet techniques. Use the following video tutorials as needed:
The loop already on the hook at the beginning of the row counts as the first st.
Always Tunisian simple stitch in the last st of the row, being sure to work under both loops of the st.
Return Pass: Follow the foundation row and each row with the Return Pass in the same color unless a color change is needed.
Return Pass Instructions: Ch 1, *yarn over, pull through two loops; repeat from * until 1 loop remains on the hook.
Increase: Tunisian simple stitch, then work Tunisian knit stitch into the same stitch.
Abbreviations:
Ch: Chain Tss: Tunisian simple stitch RetP: Return Pass -Explained above Sc: Single crochet Inc: Increase Tks: Tunisian knit stitch Tss2tog: Tunisian simple stitch two together
LONG SIZE COLOR CHART
Pattern Instructions (Long Size):
Join Col A to a wooden ring with a slip knot. Sc 8 around a wooden ring.
Row 1: Turn and work the foundation row into the sc stitches. Pick up a loop into the next 8 sts. Complete normal RetP.
Row 2: Inc, Tss across until there are 2 sts remaining, inc, work last st as normal.
Rows 3 to 7: Repeat row 2. At the end of row 7, you should have 18 sts.
Row 8: Inc, tss across, work last st as normal. (19 sts). Rows 9 to 13: Tss across. (19 sts). At the end of the RetP join Col B.
Note: Complete color chart in Tunisian simple stitch. Refer to the chart above. Refer to the video tutorial for how to complete colorwork.
Note: Refer to color chart for rows 14 to 27 colorwork Row 14: (Col B) x 19 Rows 15 to 17: (Col B) x 9, (Col A) x 1, (Col B) x 9 Row 18: (Col B) x 4, (Col A) x 11, (Col B) x 4 Row 19: (Col B) x 3, (Col A) x 13, (Col B) x 3 Row 20: (Col B) x 2, (Col A) x 15, (Col B) x 2 Row 21: (Col B) x 3, (Col A) x 13, (Col B) x 3 Row 22: (Col B) x 2, (Col A) x 3, (Col B) x 3, (Col A) x 3, (Col B) x 3, (Col A) x 3, (Col B) x 2 Row 23: (Col B) x 3, (Col A) x 1, (Col B) x 3, (Col A) x 5, (Col B) x 3, (Col A) x 1, (Col B) x 3 Row 24: (Col B) x 6, (Col A) x 1, (Col B) x 1, (Col A) x 3, (Col B) x 1, (Col A) x 1, (Col B) x 6 Row 25: (Col B) x 8, (Col A) x 3, (Col B) x 8 Row 26: (Col B) x 9, (Col A) x 1, (Col B) x 9 Row 27: (Col B) x 19. Join Col A at the end of RetP. Leave a 6 in. tail and cut Col B yarn. Rows 28 to 39: Tss across. Row 40: Tss across. Join Col B at the end of RetP
Note: Refer to color chart for rows 41 to 54 colorwork
Row 41: (Col B) x 19 Row 42: (Col B) x 9, (Col A) x 1, (Col B) x 9 Row 43: (Col B) x 8, (Col A) x 3, (Col B) x 8 Row 44: (Col B) x 6, (Col A) x 1, (Col B) x 1, (Col A) x 3, (Col B) x 1, (Col A) x 1, (Col B) x 6 Row 45: (Col B) x 3, (Col A) x 1, (Col B) x 3, (Col A) x 5, (Col B) x 3, (Col A) x 1, (Col B) x 3 Row 46: (Col B) x 2, (Col A) x 3, (Col B) x 3, (Col A) x 3, (Col B) x 3, (Col A) x 3, (Col B) x 2 Row 47: (Col B) x 3, (Col A) x 13, (Col B) x 3 Row 48: (Col B) x 2, (Col A) x 15, (Col B) x 2 Row 49: (Col B) x 3, (Col A) x 13, (Col B) x 3 Row 50: (Col B) x 4, (Col A) x 11, (Col B) x 4 Rows 51 to 53: (Col B) x 9, (Col A) x 1, (Col B) x 9 Row 54: Tss across with Col B. Join Col A at the end of RetP. Leave a 6 in. tail of Col B and cut yarn. Rows 55 to 59: Tss across with Col B. (19 sts) Rows 60 to 64: Tss2tog, Tss across until there are 3 sts remaining, Tss2tog, work last st as normal. (9 sts) Row 65: Tss2tog, tss across, work last st as normal.
Working through each vertical bar, sc around the wooden ring. Leave a 6 in. tail and cut yarn. Weave in all loose ends.
SHORT SIZE COLOR CHART
Pattern Instructions (Short Size):
Join Col A to a wooden ring with a slip knot. Sc 8 around a wooden ring.
Row 1: Turn and work the foundation row into the sc stitches. Pick up a loop into the next 8 sts. Complete normal RetP.
Row 2: Inc, Tss across until there are 2 sts remaining, inc, work last st as normal.
Rows 3 to 7: Repeat row 2. At the end of row 7, you should have 18 sts.
Row 8: Inc, tss across, work last st as normal. (19 sts).
Rows 9 and 10: Tss across. At the end of the RetP join Col B.
Note: Complete color chart in Tunisian simple stitch. Refer to the chart above. Refer to the video tutorial for how to complete colorwork.
Note: Refer to color chart for rows 11 to 27 colorwork
Row 11: (Col B) x 19 Rows 12 to 14: (Col B) x 9, (Col A) x 1, (Col B) x 9 Row 15: (Col B) x 4, (Col A) x 11, (Col B) x 4 Row 16: (Col B) x 3, (Col A) x 13, (Col B) x 3 Row 17: (Col B) x 2, (Col A) x 15, (Col B) x 2 Row 18: (Col B) x 3, (Col A) x 13, (Col B) x 3 Row 19: (Col B) x 2, (Col A) x 3, (Col B) x 3, (Col A) x 3, (Col B) x 3, (Col A) x 3, (Col B) x 2 Row 20: (Col B) x 3, (Col A) x 1, (Col B) x 3, (Col A) x 5, (Col B) x 3, (Col A) x 1, (Col B) x 3 Row 21: (Col B) x 6, (Col A) x 1, (Col B) x 1, (Col A) x 3, (Col B) x 1, (Col A) x 1, (Col B) x 6 Row 22: (Col B) x 8, (Col A) x 3, (Col B) x 8 Row 23: (Col B) x 9, (Col A) x 1, (Col B) x 9 Row 24: (Col B) x 19. Join Col A at the end of RetP. Leave a 6 in. tail and cut Col B yarn. Rows 25 and 26: Tss across. Row 27: Tss across. Join Col B at the end of RetP
Note: Refer to color chart for rows 28 to 41 colorwork
Row 28: (Col B) x 19 Row 29: (Col B) x 9, (Col A) x 1, (Col B) x 9 Row 30: (Col B) x 8, (Col A) x 3, (Col B) x 8 Row 31: (Col B) x 6, (Col A) x 1, (Col B) x 1, (Col A) x 3, (Col B) x 1, (Col A) x 1, (Col B) x 6 Row 32: (Col B) x 3, (Col A) x 1, (Col B) x 3, (Col A) x 5, (Col B) x 3, (Col A) x 1, (Col B) x 3 Row 33: (Col B) x 2, (Col A) x 3, (Col B) x 3, (Col A) x 3, (Col B) x 3, (Col A) x 3, (Col B) x 2 Row 34: (Col B) x 3, (Col A) x 13, (Col B) x 3 Row 35: (Col B) x 2, (Col A) x 15, (Col B) x 2 Row 36: (Col B) x 3, (Col A) x 13, (Col B) x 3 Row 37: (Col B) x 4, (Col A) x 11, (Col B) x 4 Rows 38 to 40: (Col B) x 9, (Col A) x 1, (Col B) x 9 Row 41: Tss across with Col B. Join Col A at the end of RetP. Leave a 6 in. tail of Col B and cut yarn. Rows 42 and 43: Tss across with Col B. (19 sts) Rows 44 to 48: Tss2tog, Tss across until there are 3 sts remaining, Tss2tog, work last st as normal. (9 sts) Row 49: Tss2tog, tss across, work last st as normal.
Working through each vertical bar, sc around the wooden ring. Leave a 6 in. tail and cut yarn. Weave in all loose ends.
You are done! Have any questions? The best way to reach me is via email: [email protected]
Share your finished topper with me on social media using the hashtag #CanehdianTowelTopper for a chance to be featured! Tag me on Instagram @noorsknits and Facebook @noorsknits1
This pattern is for a fun monkey face Tunisian crochet applique. Practice the basic Tunisian crochet stitches and techniques!
Milowe Crochet Monkey Pattern Inspiration
A few weeks ago, my friends over at Hobbii Yarn sent over some yarn for a fun Application challenge! This challenge was for creating a fun and cute applique for kids and everyone really so I decided on a cute Avocado applique and a monkey applique. Because who doesn’t love cute Avocados and monkeys?! You can find the Avocado applique free pattern here.
In the process of designing this cutie pie, Milowe the Monkey, I even thought of making him a robot but I didn’t like the idea too much so I finally settled on a simple face using the basics of Tunisian crochet and traditional crochet! This is the perfect hybrid pattern to start off with if you’re just wanting to learn the basics of Tunisian crochet. You can just sub in a straight crochet hook in size J 6.0 mm instead of the Tunisian crochet hook listed in the pattern and you do not need any other special hooks or tools! Keep reading for the pattern written instructions and a full video tutorial on my YouTube channel!
Gauge is not important for this project but as a reference it is 5 sts over 4 rows in Tunisian simple stitch for a 1 x 1 in. square using a J 10 6 mm Tunisian crochet hook.
Finished Size:
The finished size of the applique laid flat is 3.5 x 2.5 in.
The loop already on the hook at the beginning of the row counts as the first st.
Always Tunisian simple stitch in the last st of the row, being sure to work under both loops of the st.
Return Pass: Follow the foundation row and each row with the Return Pass in the same color unless a color change is needed.
Return Pass Instructions: Ch 1, *yarn over, pull through two loops; repeat from * until 1 loop remains on the hook.
Increase: Tunisian knit stitch into the same stitch you just worked into
Decrease: Tunisian simple stitch two stitches together
Abbreviations:
Col A: Color A Col B: Color B Ch: Chain Tss: Tunisian simple stitch RetP: Return Pass -Explained above Tks: Tunisian knit stitch Tss2tog: Tunisian simple stitch two stitches together Sc: Single crochet Hdc: Half double crochet Sl st: Slip stitch
Free Crochet Monkey Pattern Instructions:
Ch 5 with Col A
Row 1: Complete foundation row. Normal RetP (5 sts)
Row 2: Tss, inc, tss until there are 2 sts remaining, inc, work last st as normal (7 sts)
Row 3: Tss across (7 sts)
Row 4: Inc, tss into same st, tss 3, tss, inc into the same st, work last st as normal (9 sts)
Rows 5 to 7: Tss across (9 sts)
Row 8: Tss2tog, tss 3, tss2tog, work last st as normal (7 sts)
Row 9: Tss2tog, tss 1, tss2tog, work last st as normal (5 sts)
Bind off. Leave a 6 in. tail and cut yarn.
Join Col B and work sc around. Sl st into the first sc. Sc around and sl st into the first sc.
Leave a 12 in. tail and cut yarn. With the Col B tail, embroider the nose and mouth as shown in the video and in the picture below. Leaving a 6 in. tail, cut yarn and weave in loose ends.
Attach safety eyes as seen in the third row from the top.
With Col A, make a magic circle and sc 6 into the center, pull the circle closed. Join Col B and Sc twice into each st around. Leave a long tail for sewing. Repeat 3 more times to make a total of 4 ears.
With right sides facing you, tuck in loose ends and whip stitch 2 ears together. Repeat with the second pair of ears.
Align the face and ears as shown in the picture and video and sew together.
Back Panel:
Rnd 1: With Col B and 4.5 mm crochet hook, make a magic circle and hdc 6 into the center, pull the circle closed.
Rnd 2: Ch 1, hdc 2 into each st around. Sl st into the first hdc to join.
Rnd 3: Ch 1, (hdc 2 into next st, hdc into next st)* rep * around. Sl st into the first hdc to join.
Rnd 4: Ch 1, (hdc 2 into next st, hdc into next 2 sts)* rep * around. Sl st into the first hdc to join.
Rnd 5: Ch 1, hdc around, sl st into first hdc to join.
With all loose ends tucked inside and right sides of face and back panel facing you, whip st. around making sure to whip st. through the ears.
You are done! Have any questions? The best way to reach me is via email: [email protected]
Share your finished appliques with me on social media using the hashtag #MilowetheMonkey for a chance to be featured. Tag me on Instagram @noorsknits and Facebook @noorsknits1
Gauge is not important for this project but as a reference it is 5 sts over 4 rows in Tunisian simple stitch for a 1 x 1 in. square using a J 10 6 mm Tunisian crochet hook.
Finished Size:
The finished size of the applique laid flat is 4.5 x 2.5 in.
Crochet Food Pattern Notes:
This pattern is for a fun Avocado Tunisian crochet applique. Practice the basic Tunisian crochet stitches and techniques!
FULL VIDEO TUTORIAL:
This pattern uses a few Tunisian crochet techniques. Use the following video tutorials as needed:
RetP: Return Pass -Explained above Tks: Tunisian knit stitch
Tss2tog: Tunisian simple stitch two stitches together Sc: Single crochet Sl st: Slip stitch
Crochet Food Pattern Instructions:
BODY:
Ch 7 with Col A
Row 1: Complete foundation row. Normal RetP (7 sts)
Row 2: Tss, inc, tss until there are 2 sts remaining, inc, work last st as normal (9 sts)
Rows 3 and 4: Tss across (9 sts)
Row 5: Inc, tss into same st, join Col B and tss 5, change to Col A and tss, inc into the same st, work last st as normal (11 sts)
Rows 6 and 7: Tss 1 with Col A, switch to Col B and tss 7, switch to Col A and tss 1, work last st as normal (11 sts)
Row 8: Tss2tog with Col A, switch to Col B and work tss 5, switch to Col A and tss2tog, work last st as normal (9 sts)
Row 9: Tss across with Col A (9 sts)
Row 10: Tss2tog, tss 3, tss2tog, work last st as normal (7 sts)
Row 11: Tss across (7 sts)
Row 12: Tss2tog, tss 1, tss2tog, work last st as normal (5 sts)
Bind off. Leave a 6 in., tail for Col A and cut yarn. Leave an 8 in. tail for Col B and cut yarn.
Attach safety eyes in the center of the 3rd row from the top and use the Col B tail to embroider the mouth.
Join Col C and Sc around. Sl st into first sc. Leave a long tail for sewing and cut yarn.
HAT
Ch 9 with Col B
Row 1: Complete foundation row. Normal RetP
Row 2: Bind off 2 sts, tss 5
Rows 3 to 5: Tss across
Bind off and sl st down the left edge. Leave a long tail for sewing and cut yarn.
BOW
Ch 8 with Col B
Row 1: Complete foundation row. Normal RetP
Rows 2 to 4: Tss across
Bind off. Leave a long tail for sewing and cut yarn. Sew hat or bow onto the upper right corner of the avocado. Use as an applique or create a second panel without the colorwork, eyes, and mouth, join panels, stuff with polyfill and create it into a food toy or amigurumi!
You are done! Have any questions? The best way to reach me is via email: [email protected]
Share your finished appliques with me on social media using the hashtag #MrCadoandMrsCaddy for a chance to be featured. Tag me on Instagram @noorsknits and Facebook @noorsknits1
Keywords: tunisian crochet lattice stitch, tunisian crochet stitches, beginner tunisian crochet patterns free, tunisian crochet stitches pdf, tunisian crochet stitches for beginners, tunisian crochet stitches free, lattice stitch crochet, tunisian lattice stitch, tunisian diagonal lattice stitch, tunisian crochet diagonal lattice stitch, tunisian lattice stitch square
A simple free afghan square crochet pattern with a simple lattice design using the Tunisian crochet lattice stitch.
Tunisian Lattice Stitch Square Inspiration:
The Tunisian crochet lattice stitch is a simple and fun stitch to work up. This square is inspired by the winding trails and steps involved in walking to the top of a mountain. For this square, you need to know the Tunisian simple stitch and how to Tunisian simple stitch two together/Tunisian crochet decreases. Don’t worry because I have tutorials for each of these stitches/techniques! This is also the final square of the blanket! Don’t forget to share your squares or even progress of the squares over on Instagram and Facebook for a chance to enter the giveaway! Find all the details over in the main TCAL post!
Although you can use yarn from your stash, since this is a themed blanket, it’s preferable you use the same colors. I used Comfy Worsted yarn which was kindly gifted by We Crochet!
US 10 6 mm Tunisian crochet hook with a 12 in. cord and stopper – I used the Radiant Wood Interchangeable Tunisian crochet hook with cord and stopper gifted from We Crochet.
Keywords: tunisian knit stitch square pattern free, easy tunisian knit square pattern, tunisian knit stitch, tunisian knit stitch blanket, tunisian knit stitch crochet, tunisian knit square pattern, mountain baby blanket crochet pattern, free crochet patterns, Tunisian crochet knit stitch, duplicate stitch patterns, surface crochet, duplicate stitch knitting, how to do duplicate stitch on crochet, how to do duplicate stitch in knitting
A fun Tunisian knit stitch square pattern as part of the Wild One Baby Blanket. Practice the knit stitch and duplicate stitch embroidery!
*This post contains affiliate links. If you purchase anything through these links, I will earn a small commission at no extra cost to you.*
Tunisian Knit Stitch Square Inspiration:
The arrowheads are a cute touch reminiscent of the directions when you are on a mountain trail. The perfect cozy touch to a Wild One themed blanket! For this square, I wanted to try something different for those who prefer not to do color work. The duplicate stitch is another alternative to doing color work and it works perfectly on the Tunisian knit stitch square. You would complete it exactly the same way as you would on a knitted piece.
Although you can use yarn from your stash, since this is a themed blanket, it’s preferable you use the same colors. I used Comfy Worsted yarn which was kindly gifted by We Crochet!
US 10 6 mm Tunisian crochet hook with a 12 in. cord and stopper – I used the Radiant Wood Interchangeable Tunisian crochet hook with cord and stopper gifted from We Crochet.
Note: Complete a solid square using only Col B in Tunisian knit stitch. After completing the solid square, you will use the duplicate stitch to embroider arrowheads onto the solid square. Refer to the chart above.
Watch the complete tutorial here for the Tunisian Knit Stitch Square Arrowheads Pattern:
Row 1: Ch 25 with Col B and complete foundation row.
Rows 2 to 30: Tks across.
Turn square upside down and embroider arrowheads using duplicate stitch with Col C double stranded as seen in the chart and in the video tutorial.
Bind off, leave a 6 in. tail and cut yarn. Weave in loose ends. Steam block square to dimensions. Repeat until you have 4 squares.
Keyword: tunisian simple stitch blanket, tunisian crochet patterns, how to do tunisian crochet simple stitch, tunisian crochet simple stitch cast off, tunisian crochet simple stitch tutorial, 5 simple stitches for tunisian crochet beginners, tunisian crochet stitches written instructions, tunisian simple stitch crochet, tunisian simple stitch tutorial, tunisian simple stitch blanket, tunisian simple stitch blanket pattern, tunisian simple stitch pattern, tunisian simple stitch color change, youtube tunisian simple stitch, how to do tunisian simple stitch, how to finish tunisian simple stitch, foundation tunisian simple stitch, tss tunisian simple stitch, tunisian crochet simple stitch blanket, tunisian crochet graphghan, tunisian crochet stitches, intarsia tunisian crochet, fair isle tunisian crochet, tunisian crochet two colors
A fun Tunisian crochet simple stitch square pattern using basic color changes as part of the Wild One Baby Blanket.
*This post contains affiliate links. If you purchase anything through these links, I will earn a small commission at no extra cost to you.*
Tunisian Simple Stitch Square Inspiration:
Any time I think of the Wild One theme, immediately I imagine the simplicity of nature and its beauty! Climbing a mountain can be a great feat but the views are absolutely gorgeous. This square represents that simplicity and beauty! The perfect cozy touch to a Wild One themed blanket. I hope you love working up this square as you practice the basic Tunisian simple stitch and some basic colorwork!
Although you can use yarn from your stash, since this is a themed blanket, it’s preferable you use the same colors. I used Comfy Worsted yarn which was kindly gifted by We Crochet!
US 10 6 mm Tunisian crochet hook with a 12 in. cord and stopper – I used the Radiant Wood Interchangeable Tunisian crochet hook with cord and stopper gifted from We Crochet.
Keywords: tunisian honeycomb square pattern free, easy tunisian honeycomb square pattern, tunisian honeycomb stitch, tunisian honeycomb stitch blanket, tunisian purl stitch, tunisian honeycomb stitch crochet, tunisian honeycomb square pattern, mountain baby blanket crochet pattern, free crochet patterns
A fun Tunisian crochet honeycomb stitch square pattern as part of the Wild One Baby Blanket. Practice some basic Tunisian crochet stitches!
*This post contains affiliate links. If you purchase anything through these links, I will earn a small commission at no extra cost to you.*
Tunisian Honeycomb Stitch Square Inspiration:
Any time I think of the Wild One theme, immediately I imagine the beautiful textures on the snowcapped mountains glistening on a starry night! The perfect cozy touch to a Wild One themed blanket! It has been a really long time since I designed a crochet baby blanket so I am super excited about how this one came together! I absolutely love the Tunisian honeycomb stitch it is so fun to make!
Although you can use yarn from your stash, since this is a themed blanket, it’s preferable you use the same colors. I used Comfy Worsted yarn which was kindly gifted by We Crochet!
US 10 6 mm Tunisian crochet hook with a 12 in. cord and stopper – I used the Radiant Wood Interchangeable Tunisian crochet hook with cord and stopper gifted from We Crochet.