Try out this cozy Tunisian crochet scarf pattern to practice some fun colorwork and the Tunisian knit stitch.
Keywords: tunisian knit stitch scarf, tunisian crochet cowl pattern, tunisian crochet scarf pattern pdf, tunisian crochet scarf pattern for beginners, elegant tunisian crochet scarf, what is tunisian crochet, tunisian crochet scarf patterns, beginner tunisian crochet scarf pattern, tunisian crochet infinity scarf patterns, how to tunisian crochet a scarf, easy tunisian crochet scarf patterns, Tunisian crochet scarf, Crochet scarf pattern, Tunisian stitch, Tunisian crochet technique, Crochet project, Textured scarf, Tunisian simple stitch, Tunisian knit stitch, Crochet accessory, Tunisian crochet for beginners, Winter scarf, Tunisian crochet design, DIY scarf, Crochet pattern, Tunisian crochet tutorial, Handmade scarf, Tunisian crochet essentials, Scarf with fringe, Colorful scarf, Tunisian crochet basics, Tunisian crochet colorwork, Crochet gift idea, Warm and cozy scarf
Materials
Inspiration
A couple of months ago, I was invited to participate in a fun challenge by Hobbii Yarn, the Japandi Challenge and I had to hop on! The challenge was based on a Japanese x Scandinavian theme – and we were invited to explore and interpret these themes through our pattern designing skills.
I chose to create a Tunisian crochet scarf using Hobbii Pearly Haze (the softest most beautiful yarn I have ever used) to represent the Japandi theme. I decided on these beautiful soft colors that worked so well together. I chose Turkish Blue, Teal, and Cream. Initially, I did a poll to ask whether you all wanted stripes or colorblock sections for the color work and a lot of people said stripes but the designer in my couldn’t let go of the idea of color blocks so I did a mix of both. The scarf has a lot of character and can be worn in many different ways! Of course I had to finish off with some fringe to complete the look!
A huge thank you to Hobbi Yarn for providing the yarn for this pattern!
Ps. If you’re on my mailing list, be sure to check your email for a special discount!
About Pattern
This pattern is inspired by the Japanese and Scandinavian aesthetic. This scarf will be a simple and relaxing design created with the Tunisian knit stitch and some basic colorwork. Fringe will be added to finish off the design. Tunisian crochet is making a comeback and this pattern will be great for beginners and advanced crocheters alike for getting familiar with the basic Tunisian crochet stitches and minimalist colorwork design. It will be the perfect addition to any winter wardrobe! This pattern is worked flat in one piece, bottom-up. The techniques used in this pattern include Tunisian crochet knit stitch and changing colors in Tunisian crochet. This pattern can be completed by an advanced-beginner. The pattern includes video tutorials for the techniques used. The pattern is divided into 4 sections and each section has an accompanying overview picture and color chart provided.
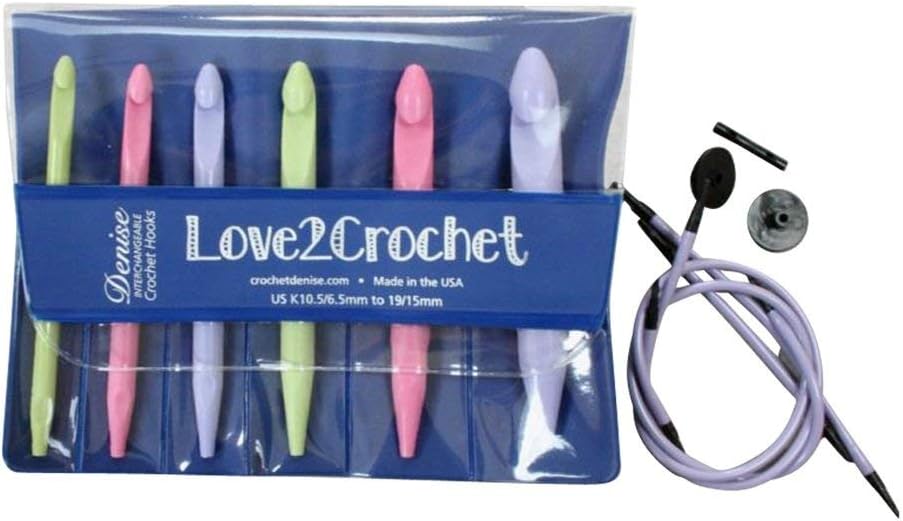
Hook: Size L 8.0 mm Tunisian crochet hook at least 12 in. long or with 12 in. cord and stopper. I used my Furls Cruella Deville Tunisian crochet hook. It is currently not in stock but my other faves are the Clover Takumi Tunisian crochet hooks or the Denise Interchangeable Hooks!
The kit consists of a choice of 16 or 26 Wander skeins, hook, tote, and digital pattern. You can choose from 4 color palettes in order to create the hypnotic spiral design in one of two sizes.
Keywords: tunisian knit stitch square pattern free, easy tunisian knit square pattern, tunisian knit stitch, tunisian knit stitch blanket, tunisian knit stitch crochet, tunisian knit square pattern, mountain baby blanket crochet pattern, free crochet patterns, Tunisian crochet knit stitch, duplicate stitch patterns, surface crochet, duplicate stitch knitting, how to do duplicate stitch on crochet, how to do duplicate stitch in knitting
A fun Tunisian knit stitch square pattern as part of the Wild One Baby Blanket. Practice the knit stitch and duplicate stitch embroidery!
*This post contains affiliate links. If you purchase anything through these links, I will earn a small commission at no extra cost to you.*
Tunisian Knit Stitch Square Inspiration:
The arrowheads are a cute touch reminiscent of the directions when you are on a mountain trail. The perfect cozy touch to a Wild One themed blanket! For this square, I wanted to try something different for those who prefer not to do color work. The duplicate stitch is another alternative to doing color work and it works perfectly on the Tunisian knit stitch square. You would complete it exactly the same way as you would on a knitted piece.
Although you can use yarn from your stash, since this is a themed blanket, it’s preferable you use the same colors. I used Comfy Worsted yarn which was kindly gifted by We Crochet!
US 10 6 mm Tunisian crochet hook with a 12 in. cord and stopper – I used the Radiant Wood Interchangeable Tunisian crochet hook with cord and stopper gifted from We Crochet.
Note: Complete a solid square using only Col B in Tunisian knit stitch. After completing the solid square, you will use the duplicate stitch to embroider arrowheads onto the solid square. Refer to the chart above.
Watch the complete tutorial here for the Tunisian Knit Stitch Square Arrowheads Pattern:
Row 1: Ch 25 with Col B and complete foundation row.
Rows 2 to 30: Tks across.
Turn square upside down and embroider arrowheads using duplicate stitch with Col C double stranded as seen in the chart and in the video tutorial.
Bind off, leave a 6 in. tail and cut yarn. Weave in loose ends. Steam block square to dimensions. Repeat until you have 4 squares.
Give this free Tunisian crochet cable square pattern a try! A mix of the honeycomb and cable crochet stitches creates a beautiful texture!
This post contains affiliate links, if you purchase from any of the links, I will get a small commission at no extra cost to you.
I haven’t really dived into crochet cable patterns yet and this is the first time I am sharing one and I am so excited! Have you tried the Tunisian crochet cable stitch? It is so fun to do and it creates a beautiful texture.
If you are here in search for crochet cable squares, I have just the pattern for you! This pattern is for a free Tunisian crochet cable blanket square
My friend Arunima of the @knitterknotter hosted an amazing Tunisian crochet Blaket CAL 2021 that ran for the entire year and includes a different Tunisian crochet square patterns!
I love the pop of texture this braided cable crochet stitch gives against the purl stitches. The alternating panels of Tunisian knit and purl stitches really create a beautiful design. The panel of honeycomb in the middle just adds a nice touch! I had to include the Tunisian honeycomb stitch because it’s one of my favorites Tunisian crochet stitches!
If you’re looking for a fun crochet cable granny square, this is a fun Tunisian crochet version!
I initially designed this square in a 12 x 12 in. size but have now added instructions for a 8 x 8 in. square for an upcoming charity blog event! Find both instructions below, the PDFs are sold separately for each size.
Tunisian Crochet Cable Square Pattern Instructions:
8 IN. SIZE
Ch 32
Row 1 (Foundation Row): Pick up a loop in the back bump of each chain. Complete normal RetP. (32 sts). Place sm into first st.
Row 2: Tps 3, Tks 6, Tps 3, pm on next st, (Tss, Tps)* rep * for next 8 sts, pm on next st, Tps 3, Tks 6, Tps 3, work last st as normal, pm on last st (32 sts). The stitch markers indicate the start and end of the cable and honeycomb sections of the pattern. The picture below is of the 12 in. Size square but this is just to show you how sections are divided.
Row 3: Tps 3, Tks 6, Tps 3, (Tps, Tss)* rep * for next 8 sts, Tps 3, Tks 6, Tps 3, work last st as normal (32 sts).
Row 4: Tps 3, tks 3, yo, tks 3, tps 3, (Tss, tps)* rep * for next 8 sts, Tps 3, tks 3, yo, tks 3, tps 3 (you will now have 2 extra stitches on your hook) (34 sts)
Row 5: Tps 3, tks 3, skip yo sp from previous row, tks 3, tps 3, (Tps, Tss)* rep * for next 8 sts, tps 3, tks 3, skip yo sp from previous row, tks 3, tps 3, work last st as normal (32 sts)
Row 6: Tps 3, tks 3, slip knit sts just worked onto cable needle and keep at front of work, tks 3, slip sts from cable needle back onto hook, tps 3 (tss, tps)* rep * For the next 8 sts, Tps 3, tks 3, slip sts just worked onto the cable needle and keep atfront of work, tks 3, slip sts from cable needle back onto hook, tps 3, work last st as normal. (32 sts)
Row 7: Tps 3, Tks 6, Tps 3, (Tps, Tss)* rep * for next 8 sts, Tps 3, Tks 6, Tps 3, work last st as normal (32 sts).
Row 8: Tps 3, Tks 6, Tps 3, (Tss, Tps)* rep * for next 8 sts, Tps 3, Tks 6, Tps 3, work last st as normal (32 sts).
Row 9: Tps 3, tks 3, yo, tks 3, tps 3, (Tps, tss)* rep * for next 8 sts, Tps 3, tks 3, yo, tks 3, tps 3 (you will now have 2 extra stitches on your hook) (34 sts)
Row 10: Tps 3, tks 3, skip yo sp from previous row, tks 3, tps 3, (Tss, Tps)* rep * for next 8 sts, tps 3, tks 3, skip yo sp from previous row, tks 3, tps 3, work last st as normal (32 sts)
Row 11: Tps 3, tks 3, slip knit sts just worked onto cable needle and keep at front of work, tks 3, slip sts from cable needle back onto hook, tps 3 (Tps, Tss)* rep * For the next 8 sts, Tps 3, tks 3, slip sts just worked onto the cable needle and keep atfront of work, tks 3, slip sts from cable needle back onto hook, tps 3, work last st as normal. (32 sts)
Row 12: Tps 3, Tks 6, Tps 3, (Tss, Tps)* rep * for next 8 sts, Tps 3, Tks 6, Tps 3, work last st as normal (32 sts).
Repeat Rows 3 to 12 until the piece measures 8 inches from the foundation row. Bind off, leave a 6 in. tail and weave in all loose ends.
Row 1 (Foundation Row): Pick up a loop in the back bump of each chain. Complete normal RetP. (50 sts). Place sm into first st.
Row 2: Tps 6, Tks 6, Tps 6, pm on next st, (Tss, Tps)* rep * for next 12 sts, pm on next st, Tps 6, Tks 6, Tps 6, work last st as normal, pm on last st (50 sts). The stitch markers indicate the start and end of the cable and honeycomb sections of the pattern.
Row 3: Tps 6, Tks 6, Tps 6, (Tps, Tss)* rep * for next 12 sts, Tps 6, Tks 6, Tps 6, work last st as normal (50 sts).
Row 4: Tps 6, tks 3, yo, tks 3, tps 6, (Tss, tps)* rep * for next 12 sts, Tps 6, tks 3, yo, tks 3, tps 6 (you will now have 2 extra stitches on your hook) (52 sts)
Row 5: Tps 6, tks 3, skip yo sp from previous row, tks 3, tps 6, (Tps, Tss)* rep * for next 12 sts, tps 6, tks 3, skip yo sp from previous row, tks 3, tps 6, work last st as normal (50 sts)
Row 6: Tps 6, tks 3, slip knit sts just worked onto cable needle and keep at front of work, tks 3, slip sts from cable needle back onto hook, tps 6, (tss, tps)* rep * For the next 12 sts, Tps 6, tks 3, slip sts just worked onto the cable needle and keep atfront of work, tks 3, slip sts from cable needle back onto hook, tps 6, work last st as normal. (50 sts)
Row 7: Tps 6, Tks 6, Tps 6, (Tps, Tss)* rep * for next 12 sts, Tps 6, Tks 6, Tps 6, work last st as normal (50 sts).
Row 8: Tps 6, Tks 6, Tps 6, (Tss, Tps)* rep * for next 12 sts, Tps 6, Tks 6, Tps 6, work last st as normal (50 sts).
Row 9: Tps 6, tks 3, yo, tks 3, tps 6, (Tps, tss)* rep * for next 12 sts, Tps 6, tks 3, yo, tks 3, tps 6 (you will now have 2 extra stitches on your hook) (52 sts)
Row 10: Tps 6, tks 3, skip yo sp from previous row, tks 3, tps 6, (Tss, Tps)* rep * for next 12 sts, tps 6, tks 3, skip yo sp from previous row, tks 3, tps 6, work last st as normal (50 sts)
Row 11: Tps 6, tks 3, slip knit sts just worked onto cable needle and keep at front of work, tks 3, slip sts from cable needle back onto hook, tps 6 (Tps, Tss)* rep * For the next 12 sts, Tps 6, tks 3, slip sts just worked onto the cable needle and keep atfront of work, tks 3, slip sts from cable needle back onto hook, tps 6, work last st as normal. (50 sts)
Row 12: Tps 6, Tks 6, Tps 6, (Tss, Tps)* rep * for next 12 sts, Tps 6, Tks 6, Tps 6, work last st as normal (50 sts).
Repeat Rows 3 to 12 until the piece measures 12 inches from the foundation row. Bind off, leave a 6 in. tail and weave in all loose ends.
You are done! Have any questions? The best way to reach me is via email: noorsknits@gmail.com
Share your finished square with me on social media using the hashtag #cablesandhoneycombsquare for a chance to be featured! Tag me on Instagram @noorsknits and Facebook @noorsknits1
Check out this fun easy Tunisian crochet earwarmer pattern. It’s the perfect one-skein one-hour project to practice the Tunisian knit stitch!
This post contains affiliate links from which I will get a small commission at no extra cost to you
The Lookin’ Swell ear warmer. This pattern is for a knit-like beginner-friendly Tunisian crochet ear warmer in toddler, child, and adult sizes that can be completed in 1 hour. It’s the perfect ear warmer to practice the basic Tunisian knit stitch! A huge thank you to my testers: @mickylathemaker, @made_with_love_by_steffi, @miashimo, @sarahsyarn, @burst_of_creativiti
This is such a cute cinched ear warmer crochet pattern and so easy to make! The best part is that the Lookin’ Swell Ear Warmer is a one-skein project and works up super fast. You can even make a matching one for your little ones as well. This pattern uses the Tunisian knit stitch which is one of the coolest Tunisian crochet stitches because it looks exactly like the knit stitch seen in knitting. I’ve included a link to a Tunisian knit stitch tutorial in the pattern that you can check out below.
I was gifted this beautiful yarn from We Crochet. I had never worked with this bulky 100% Pima cotton yarn. It is so soft and I love that it goes from thin to thick creating a beautiful texture! You can grab some Billow yarn here or by clicking the picture below!
About this Easy Tunisian crochet Earwarmer Pattern:
Skill Level: Beginner
I’ve included the instructions for the child size below, you can upgrade to the ad-free PDF for all three sizes including adult and toddler sizes.
Yarn:
Knit Picks Billowin any color, Swell is seen in the pictures below, 60yards for adult size (Size 5 bulky weight; 3.5 oz./ 100 g, 120 yd/ m; 100% Pima cotton)
Hook:
Size L11 8.0 mm Tunisian crochet hook with 8 in. Cord. Grab my favorite Clover Takumi set here.
This pattern is for a knit-like beginner-friendly Tunisian crochet ear warmer in toddler, child, and adult sizes that can be completed in 1 hour. It’s the perfect ear warmer to practice the basic Tunisian knit stitch! The best part is that it’s a one-skein project and works up super fast so it’s great for market prep and gift making! You can make a matching one for your little one as well. Below you will find the written instructions for the child size. You can upgrade to the ad-free PDF for the toddler and adult sizes.
This pattern uses a few Tunisian crochet techniques. Use the following video tutorials as needed:
The loop already on the hook at the beginning of the row counts as the first st.
Always Tunisian simple stitch in the last st of the row, being sure to work under both loops of the st.
Pattern Notes continued…
Return Pass: Follow the foundation row and each row with the Return Pass in the same color unless a color change is needed.
Return Pass Instructions: Ch 1, *yarn over, pull through two loops; repeat from * until 1 loop remains on the hook.
Note: Measure your gauge swatch across unstretched and stretched. Note the two numbers and subtract to find the difference. This is how much you will need to subtract from the head circumference measurement to determine total length.
Example:
The Gauge swatch stretched is 5 in. and unstretched it is 4 in. 5 -4 = 1 in. You will need to subtract 1 in. from the head circumference measurement.
21 in. head circumference – 1 in. = 20 in. This means you will need to work the piece to a total length of 20 in. Substitute this number for X in the pattern below.
Note: Depending on the stretchiness of yarn and head size of the toddler/child, you may want to decrease the width by 1 or 2 stitches.
Row 1 (Foundation Row): Pick up a loop in the back bump of each chain. Complete normal RetP. (11 sts)
Rows 2: Tks across. Complete normal RetP (11 sts)
Rep Row 2 for the desired length as calculated above (head circumference – X in.) For the child size, continue to 19 in. for a head circumference of 20 in. based on the calculation. This can easily be customized using the calculation.
Bind off. Fold in half with the wrong side out and whip st the edges together or sl st across. Leaving a 30 in. tail, cut yarn. Cinch and wrap yarn around until a 6 in. tail remains. Weave in all loose ends.
You are done! Have any questions? The best way to reach me is via email: noorsknits@gmail.com
Share your finished earwarmer with me on social media using the hashtag #lookinswellearwarmer for a chance to be featured! Instagram @noorsknits Facebook @noorsknits1